 Proudly Made In The USA
Account
Login
Cart
J-Head™ Farmer Assembly Guide
2 min read
J-Head™ Farmer Assembly Video #
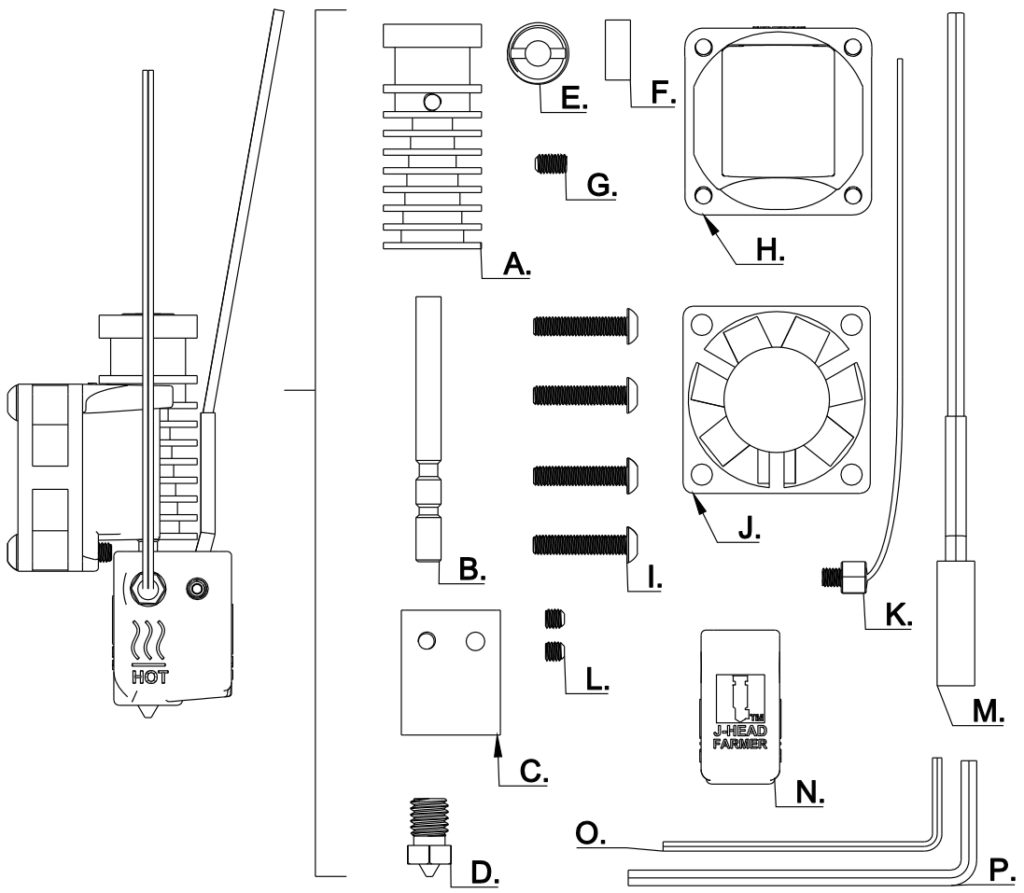
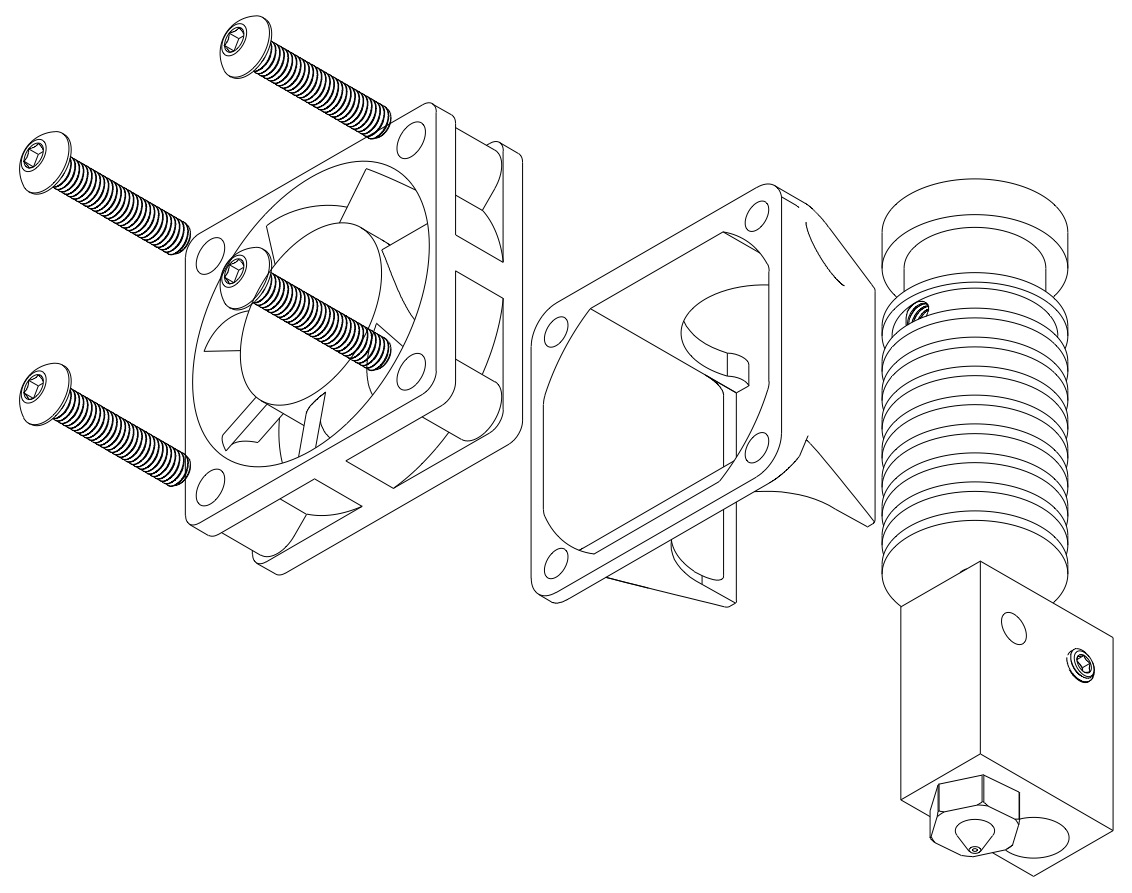
J-Head™ Farmer Includes: #
- A. - 1x Finstack
- B. - 1x Core Tube
- C. - 1x Heater Block
- D. - 1x Replaceable Nozzle
- E. - 1x Direct Drive Adapter
- F. - 1x Direct Drive PTFE Insert
- G. - 1x m3 Setscrew (long)
- H. - 1x Fan Shroud
- I. - 4x m3 Screws (fan shroud)
- J. - 1x Fan 30mm
- K. - 1x Thermistor
- L. - 1x m3 Setscrews (short)
- M. - 1x Heater Cartridge
- N. - 1x Silicone Sock
- O. - 1x 1.5mm allen wrench
- P. - 1x 2.5 allen wrench
Assembly:
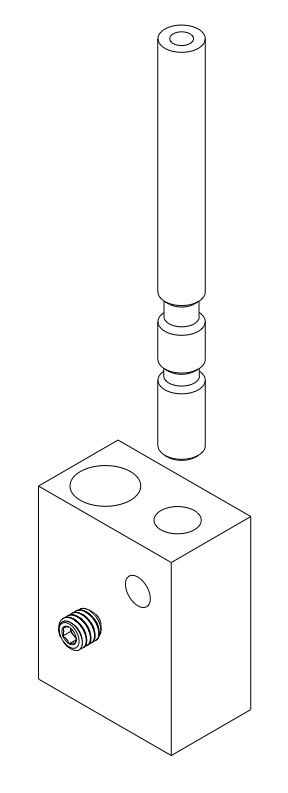
- Slide the core tube (B.) into the 4mm hole in the heaterblock. Secure using one of the short setscrews (L.) threaded in from the side of the heater block with a single threaded hole.
- Install the Nozzle (D.) *Don't Forget to Heat Tighten The Nozzle Before Printing!
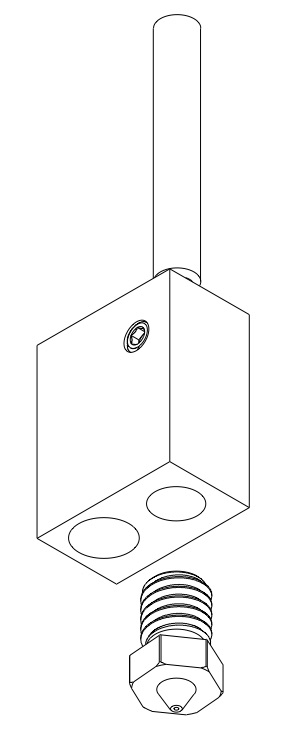
- Install Heater Cartridge(M.) and secure with short setscrew (L.)
- Slide Finstack (A.) over core tube (B.) take care to line the bottom of the finstack with the top of the heatbreak and secure with the long setscrew (G.)

- Secure Fan(J.) to the Fan Shroud(H.) with m3 Scews(I.) then clip onto the finstack(A.)
- Slide Silicone Sock (N.) over the Heaterblock (C.)
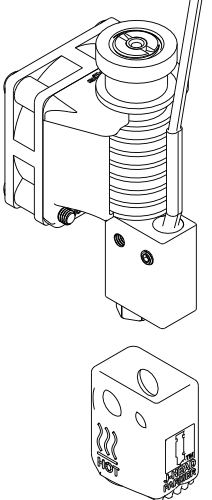
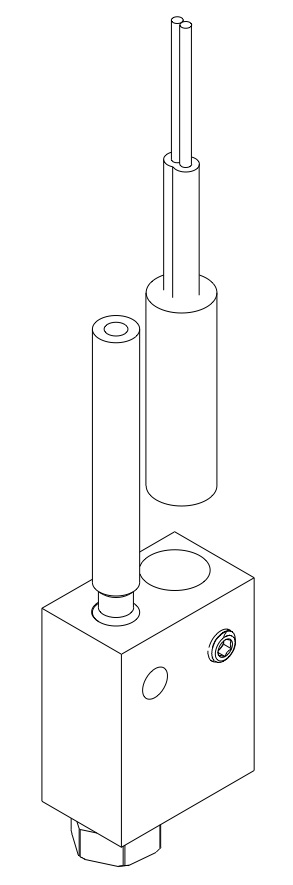
- Thread the m3 Stud Thermistor (K.) into the upper left hole on the last hole remaining in the Heater Block (C.)
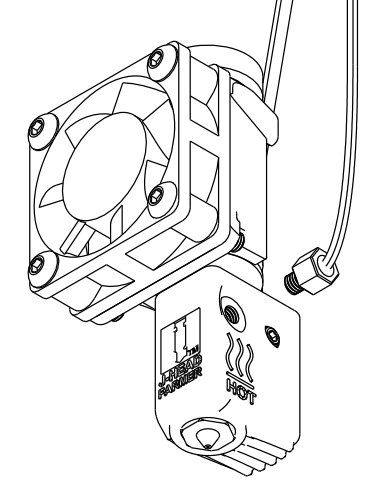
🎉 You have successfully completed assembly of your new J-Head™ Farmer Hotend… Enjoy! and happy printing! 🎉
Bonus J-Head™ Farmer Height Adjustment Video Bonus #
How To Eliminate The Paper Test?
Jog the hotend just above the print bed and drop the nozzle the rest of the way by loosening the finstack setscrew - EASY AS 1-2-3!
This also allows those with Dual Extruder printers to calibrate the hotends to be the same length!


Powered by BetterDocs